
Anyway, I make things all the time, but I never think to write down how I made it until it is too late--sometimes I get asked how and by that time it has long since left my mind, as most things do. So this time I decided to contribute to the wonderful world of D.I.Y.ers and post instructions for this cute pillow I made to go with my sister's new bedding. For all of the babysitting she has done for us, I think I owe her about 54 more pillows after this one. Too bad she has a twin bed. . . . .
And for all of you real sewers out there, I don't claim to be one--just someone who likes makin' stuff up. So, here we go:
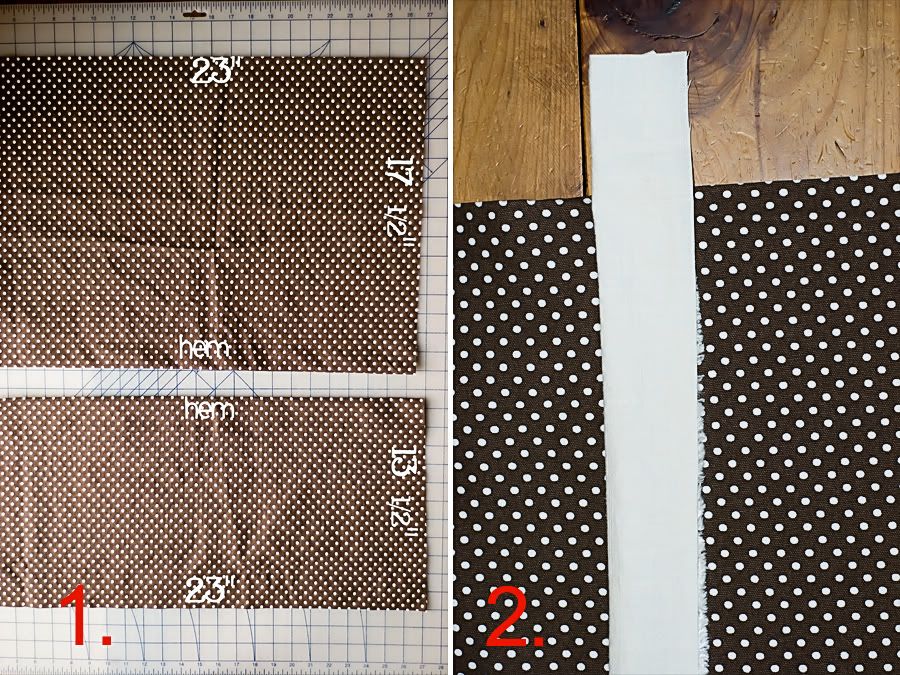
1. Measure the width across your pillow, from seam to seam. The pillow I did was a 22" square pillow. If your pillow is not square, then adjust accordingly. For the pillow front, cut one square of material one inch larger than your pillow (the material I cut was 23" x 23"). For the pillow back, I made mine an envelope closure mainly because I avoid zippers. Don't you? Cut the first piece 1" larger than your pillow x half that number + 2" (because I have a 22" pillow, I cut mine 23" x 13 1/2"). Confused? Just you wait . . . . For the second piece, cut it 1" larger than your pillow x that number + 6" (I cut mine 23" x 17 1/2"). On each of the back pieces, fold and sew one of the long sides at 1/2" and then again at 1 1/2" to make a hem. Now onto the flower!
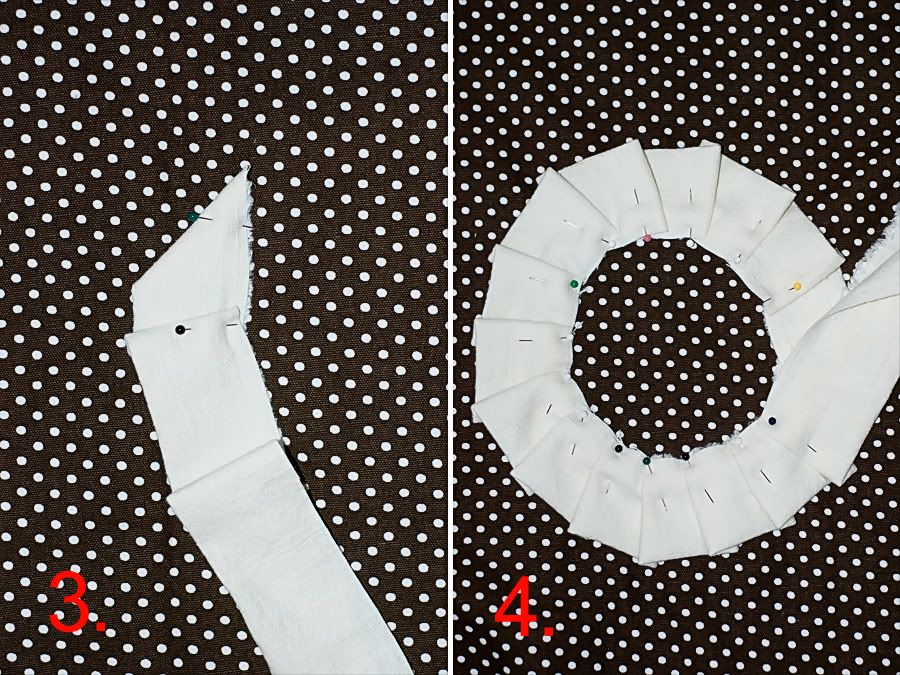
2. For the flower, I cut two strips of coordinating fabric. The strips I cut were each 4" x 65", but you can make the length whatever you want, depending on the size of the flower you want to end up with. I then sewed the two strips together to make one 4" x 130" strip of fabric. Fold it in half lengthwise (you can iron it down to keep it folded if you want--I didn't and it worked fine). Just make sure you fold the part you sewed inside. . . . I had to fix mine halfway through my pinning because I wasn't paying attention. Sounds about right!
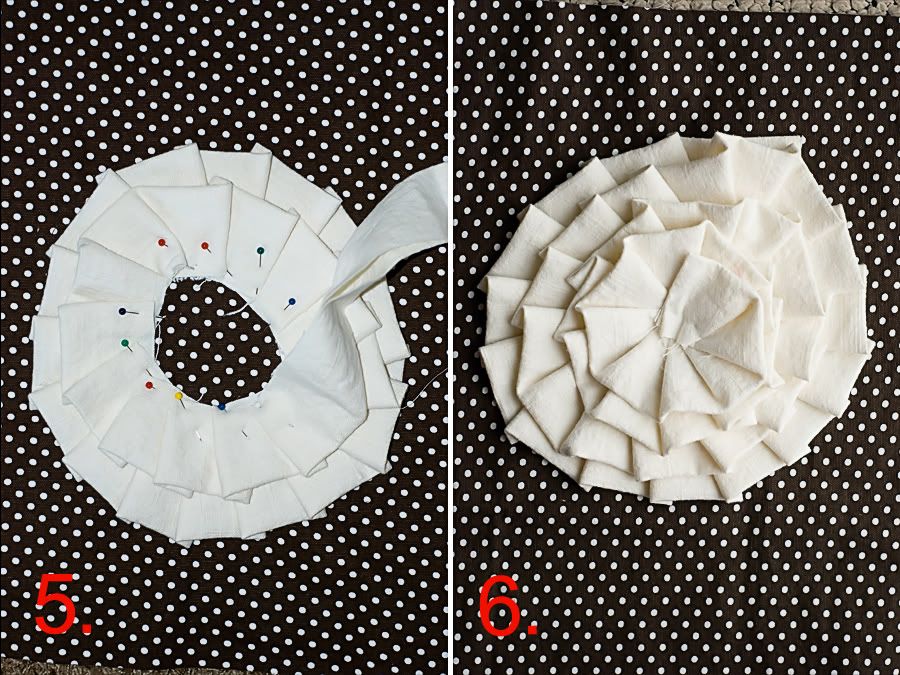
4. Then, continue pin-tucking the fabric in a circular pattern until you've come full circle. The closer the pin-tucks, the smaller the flower--the farther apart they are, the larger the flower will be. If you have thinner fabric, you may be able to sew it using a machine to your pillow about 3/4" from your unfinished edge all the way around. If it is thicker fabric, you may have to hand-stitch it, making sure to catch all of the pin-tucks and sew them down securely. I, unfortunately, had really heavy-duty fabric and had to hand-stitch the whole thing. Boo.
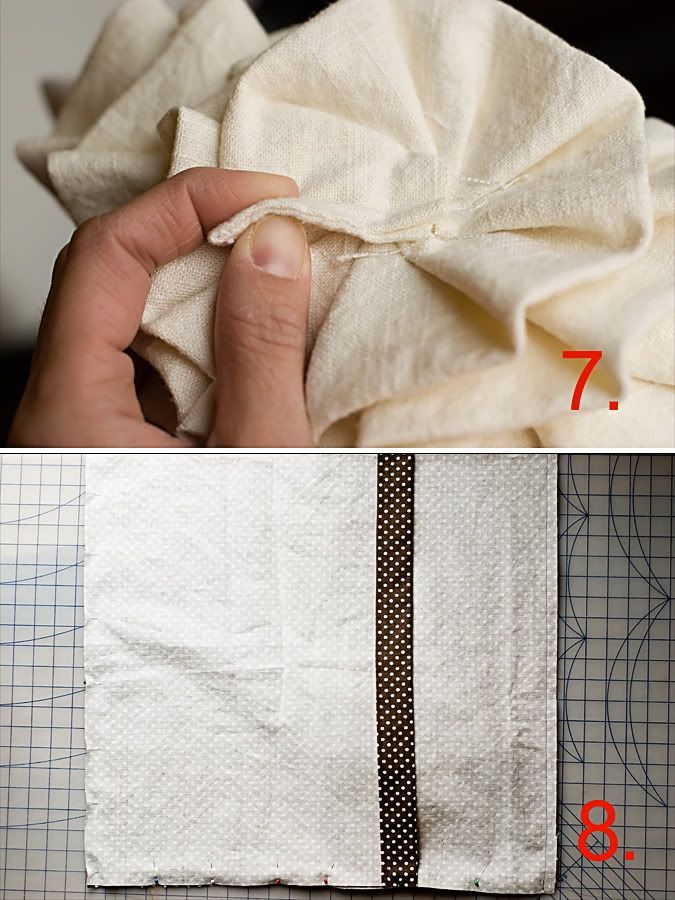
5. Continue onto the second layer of the flower, pin-tucking as you go. I brought the strip of material in about 1" from the outer edge of the flower to do the next layer. If your flower is smaller, you bring it in less. Stitch each layer before moving on to the next. Do this until you get to the center of your flower.
6. Make sure the flower is stitched down securely. I had to go back and stitch a few pin-tucks that were hanging loose.
7. Tuck in the unfinished edge of the end of your strip and hand-stitch it closed. And after looking at that photo, it appears I need to go and dunk my hands in lotion. I'll be right back.
8. Now you are ready to put your pillow together! With wrong sides facing together, place the smaller of the back pieces first and then the larger on top, so that they overlap. Now pin all sides together and sew, with 1/2" allowance.
9. Trim edges to 1/4" from stitch. This prevents extra bulk.
10. Overstitch (or whatever it is called--I don't actually know the 'real' words) your edges to prevent fraying. I also cut a notch in each of the corners so that when turned right side out, the pillow will have nice, sharp corners. Although, I guess 'sharp' and 'pillow' aren't two words you normally put together. But, trust me, it looks better.

11. Turn your pillow right sides out and add some sort of cute thing to the center of your flower. I got one of those big make-it-yourself buttons and covered it with coordinating fabric. Sew it onto the center of your flower. Insert your pillow form.
12. Ooh and aah at how cute it is! You're done!


5 comments:
What in the world????? Seriously. LOVE IT! So, so cute!!!! Way to go!!
Really, really darling Shar! My bed really needs some pillows and I even have the pillow forms - guess I just need to make one of these!!
Except you didn't show a picture of the final product! I'm a little slow and need some more visual to get these things right :)
Oh my goodness!! I totally love this pillow and you created this?!?! YOu are so creative! I love it!!! Can you make it for me instead of I do it myself? :)
Shar that is darling!
Post a Comment